In this tutorial, we will learn how to create a tabbed widget interface by using Python GUI and Tkinter package.
The Tkinter module (“Tk interface”) is the standard Python interface to the Tk GUI toolkit. Both Tk and Tkinter are available on most Unix platforms, as well as on Windows systems. (Tk itself is not part of Python; it is maintained at ActiveState.)
Tkinter package is shipped with Python as a standard package, so we don’t need to install anything to use it.
Creating Tabbed Widget With Python
import tkinter as tk
from tkinter import ttk

# intializing the window

window = tk.Tk()window.title("TABS")
# configuring size of the window
window.geometry('350x200')

#Create Tab Control

TAB_CONTROL = ttk.Notebook(window)
#Tab1TAB1 = ttk.Frame(TAB_CONTROL)
TAB_CONTROL.add(TAB1, text='Tab 1')

#Tab2TAB2 = ttk.Frame(TAB_CONTROL)
TAB_CONTROL.add(TAB2, text='Tab 2')
TAB_CONTROL.pack(expand=1, fill="both")
#Tab Name
Labelsttk.Label(TAB1, text="This is Tab 1").grid(column=0, row=0, padx=10, pady=10)
ttk.Label(TAB2, text="This is Tab 2").grid(column=0, row=0, padx=10, pady=10)
#Calling Main()
window.mainloop()
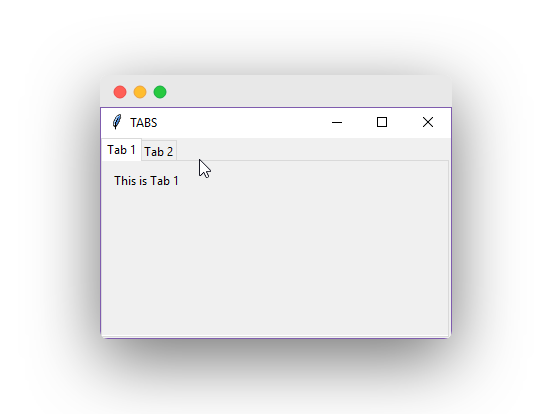
Save this code and run the file you should see a tabular window as below on your screen.

Explanation
First, we are importing the tkinter modules. Next, in the object window we are initializing the widget.
Then using the geometry('350x200') method we have assigned a default value for the size of the widget. This line sets the window width to 350 pixels and the height to 200 pixels.
Later we have a tab control, the Notebook method manages collections of windows and displays one at a time, basically used for creating tabular widgets.
Below that we have declared two tabs, and assigned some text and padding for styling. At the end we have window.mainloop() this function calls the endless loop of the window, so the window will wait for any user interaction till we close it.