In this tutorial, we will build a basic commenting system for a Django 2.X app, which lets readers add comments on posts.
Here is a preview of what we are going to build by the end of this tutorial.

Pre-Requirements
Before diving into the tutorial I am assuming that you already have a blog or some similar Django 2.X project up and running. I am using Bootstrap 4 for the styling part you can ignore it if you are using any other framework.
I am gonna use my previous blog project you can grab the repo from here, https://github.com/TheAbhijeet/Django_blog/releases/tag/1
Since Python 3 is the current version in active development and addressed as the future of Python, Django rolled out a significant update, and now all the releases after Django 2.0 are only compatible with Python 3.x. Therefore this tutorial is strictly for Python 3.x.
Roadmap To Build A Comment System
1. Create a model to save the comments.
2. Create a form to submit comments and validate the input data.
3. Add a view that processes the form and saves the new comment to the database.
4. Edit the post detail template to display the list of comments and the form to add a new comment.
Building Comment Model
Open The models.py file of blog application and below the Post model create the Comment model.
class Comment(models.Model):
    post = models.ForeignKey(Post,on_delete=models.CASCADE,related_name='comments')
    name = models.CharField(max_length=80)
    email = models.EmailField()
    body = models.TextField()
    created_on = models.DateTimeField(auto_now_add=True)
    active = models.BooleanField(default=False)

    class Meta:
        ordering = ['created_on']

    def __str__(self):
        return 'Comment {} by {}'.format(self.body, self.name)
In this comment model first, we have a Foreign key relation that establishes a many-to-one relationship with the Post model, since every comment will be made on a post and each post will have multiple comments.
The related_name attribute allows us to name the attribute that we use for the relation from the related object back to this one. After defining this, we can retrieve the post of a comment object using comment.post and retrieve all comments of a post using post.comments.all() . If you don't define the related_name attribute, Django will use the name of the model in lowercase, followed by _set (that is, comment_set ) to name the manager of the related object back to this one.
As a traditional comment system, we are accepting the commenter's name, email and comment body as inputs. Then we have an active boolean field that is set to False to prevent spam we will manually allow all the comments posted.
The Meta class inside the model contains metadata. We tell Django to sort results in the created_on field in descending order by default when we query the database. We specify descending order using the negative prefix. By doing so, comments made recently will appear first.
The __str__() method is the default human-readable representation of the object. Django will use it in many places, such as the administration site.
Next, we need to synchronize this comment model into the database by running migrations to reflects the changes in the database.
(django) $ python manage.py makemigrations
(django) $ python manage.py migrate
We are done with the models, now let's include the Comment model in our Admin dashboard.
Adding Comments Model To The Administration Site
Open admins.py file and write the following code.
from django.contrib import admin
from .models import Post, Comment
@admin.register(Comment)
class CommentAdmin(admin.ModelAdmin):
list_display = ('name', 'body', 'post', 'created_on', 'active')
list_filter = ('active', 'created_on')
search_fields = ('name', 'email', 'body')
actions = ['approve_comments']
def approve_comments(self, request, queryset):
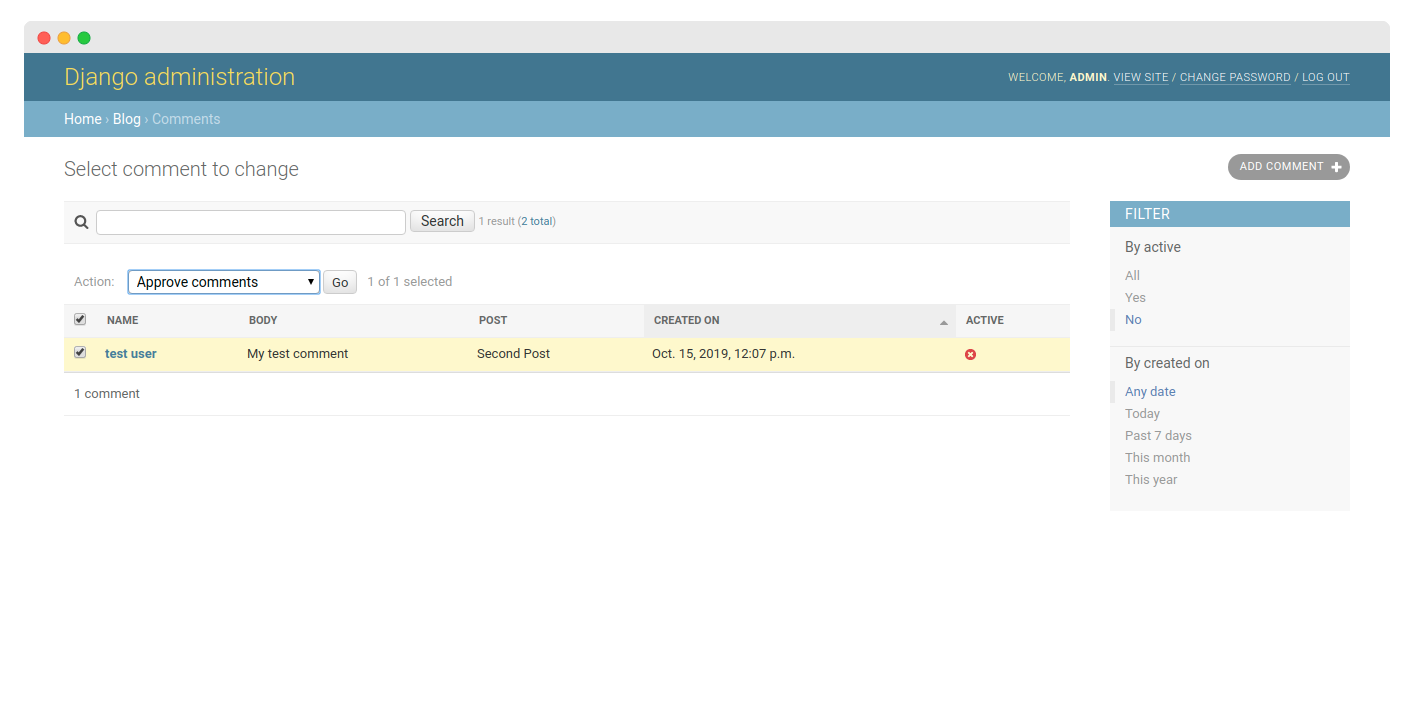
queryset.update(active=True)Going over the code @admin.register(Comment) registers the comment into the Admin area. Below the CommentAdmin class to customizes the representation of data on the screen.
The list_display attribute does what its name suggests display the properties mentioned in the tuple in the comments list for each comment.
The list_filter method will filter the comments based on the creation date and their active status and search_fields will simply search the database for the parameters provided in the tuple.
Finally, we have the actions method this will help us for approving many comment objects at once, the approve_comments method is a simple function that takes a queryset and updates the active boolean field to True.
Now create a superuser if you haven't already and log in to the dashboard you should see the comment model there.
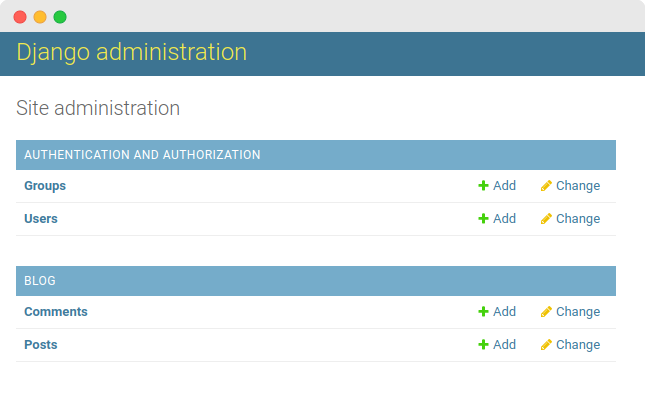
Now click on comments and create your comments.
In case you struck an error like no such table: blog_comment you might wanna delete the SQLite file and run migrations again for a quick fix.
Creating forms from models
Django offers a very rich and secure API to handle forms. Since the form input will be saved in the database models we are gonna use the Django's ModelForm.
A common practice is to create a forms.py file inside your app directory for all the forms of an app. So create a forms.py file in your app and write the following code.
from .models import Comment
from django import formsclass

 CommentForm(forms.ModelForm):
    class Meta:
        model = Comment
        fields = ('name', 'email', 'body')
In the model form, we just need to provide the model name in the Meta class of the form Django will handle the form processing and validation on the basis of fields of the model.
By default, Django will generate a form dynamically from all fields of the model but we can explicitly define the fields we want the forms to have, that is what fields attribute is doing here.
Building Views
We will modify the post detail view for form processing using function based view.
from .models import Post
from .forms import CommentForm
from django.shortcuts import render, get_object_or_404

def post_detail(request, slug):
    template_name = 'post_detail.html'
    post = get_object_or_404(Post, slug=slug)
    comments = post.comments.filter(active=True)
    new_comment = None    # Comment posted
    if request.method == 'POST':
        comment_form = CommentForm(data=request.POST)
        if comment_form.is_valid():
            # Create Comment object but don't save to database yet
            new_comment = comment_form.save(commit=False)
            # Assign the current post to the comment
            new_comment.post = post
            # Save the comment to the database
            new_comment.save()
    else:
        comment_form = CommentForm()
    return render(request, template_name, {'post': post,
                                           'comments': comments,
                                           'new_comment': new_comment,
                                           'comment_form': comment_form})
This post detail view will show the post and all its comments, let's break it down to see what's happening.
First, we assigned the HTML template to a variable name template_name for future reference and we are assigning the Post object inside the post variable.
This comments = post.comments.filter(active=True) queryset retrieves all the approved comments from the database.
Since this is the same page where users will create new comments we initialized the new_comment variable by setting it to none.
Next, we have a conditional statement if a POST request is made, the comment_form variable will hold the data of user input next Django will validate the data using the is_valid() method.
If the form is valid the following actions take place.
- We create a new Comment object by calling the form's
save()method and assign it to thenew_commentvariable, but withcommit=Flasewhich will prevent it from saving into the database right away because we still have to link it the post object - We assigned the comment object to the current post
- Finally, save the object into the database
Else if it is a GET request we initialize the form object and pass it to the template.
Adding URL patterns for Views
Open the urls.py file of your app and map the view.
path('<slug:slug>/', views.post_detail, name='post_detail')Creating Templates For The Views
Let's see what we will do in the templates.
   {% for comment in comments %}
        <div class="comments" style="padding: 10px;">
         <p class="font-weight-bold">
           {{ comment.name }}
           <span class=" text-muted font-weight-normal">
             {{ comment.created_on }}
            </span>
          </p>
          {{ comment.body | linebreaks }}
        </div>
        {% endfor %}
Here we are using Django's {% for %} template tag for looping over comments, then for each comment object, we are displaying the user's name,creation date and the comment body.
 <div class="card-body">
        {% if new_comment %}
        <div class="alert alert-success" role="alert">
          Your comment is awaiting moderation
        </div>
        {% else %}
        <h3>Leave a comment</h3>
        <form method="post" style="margin-top: 1.3em;">
          {{ comment_form.as_p }}
          {% csrf_token %}
          <button type="submit" class="btn btn-primary  btn-lg">Submit</button>
        </form>
        {% endif %}
      </div>
When a user makes a new comment we show them a message saying, "Your comment is awaiting moderation" else we render the form.
So putting the entire template all together we have this,
{% extends 'base.html' %}
 {% block content %}<div class="container">
  <div class="row">
    <div class="col-md-8 card mb-4  mt-3 left  top">
     <div class="card-body">
        <h1>{% block title %} {{ post.title }} {% endblock title %}</h1>
       <p class=" text-muted">{{ post.author }} | {{ post.created_on }}</p>
        <p class="card-text ">{{ post.content | safe }}</p>
     </div>    </div>
   {% block sidebar %}
 {% include 'sidebar.html' %}
{% endblock sidebar %}
   <div class="col-md-8 card mb-4  mt-3 ">
      <div class="card-body">
        <!-- comments -->
       <h2>{{ comments.count }} comments</h2>
        {% for comment in comments %}
        <div class="comments" style="padding: 10px;">
          <p class="font-weight-bold">
           {{ comment.name }}
            <span class=" text-muted font-weight-normal">
              {{ comment.created_on }}
            </span>
          </p>
          {{ comment.body | linebreaks }}
        </div>
        {% endfor %}
      </div>
   </div>
    <div class="col-md-8 card mb-4  mt-3 ">
      <div class="card-body">
        {% if new_comment %}
        <div class="alert alert-success" role="alert">
          Your comment is awaiting moderation
        </div>
        {% else %}
        <h3>Leave a comment</h3>
        <form method="post" style="margin-top: 1.3em;">
          {{ comment_form.as_p }}
          {% csrf_token %}
          <button type="submit" class="btn btn-primary  btn-lg">Submit</button>
        </form>
        {% endif %}
      </div>
    </div>
  </div>
</div>
{% endblock content %}
If you are working on a completely different project with some other CSS framework then ignore the styling.
Testing The Comment System
Save all the files and run the server and visit http://127.0.0.1:8000/ and visit a post detail page.
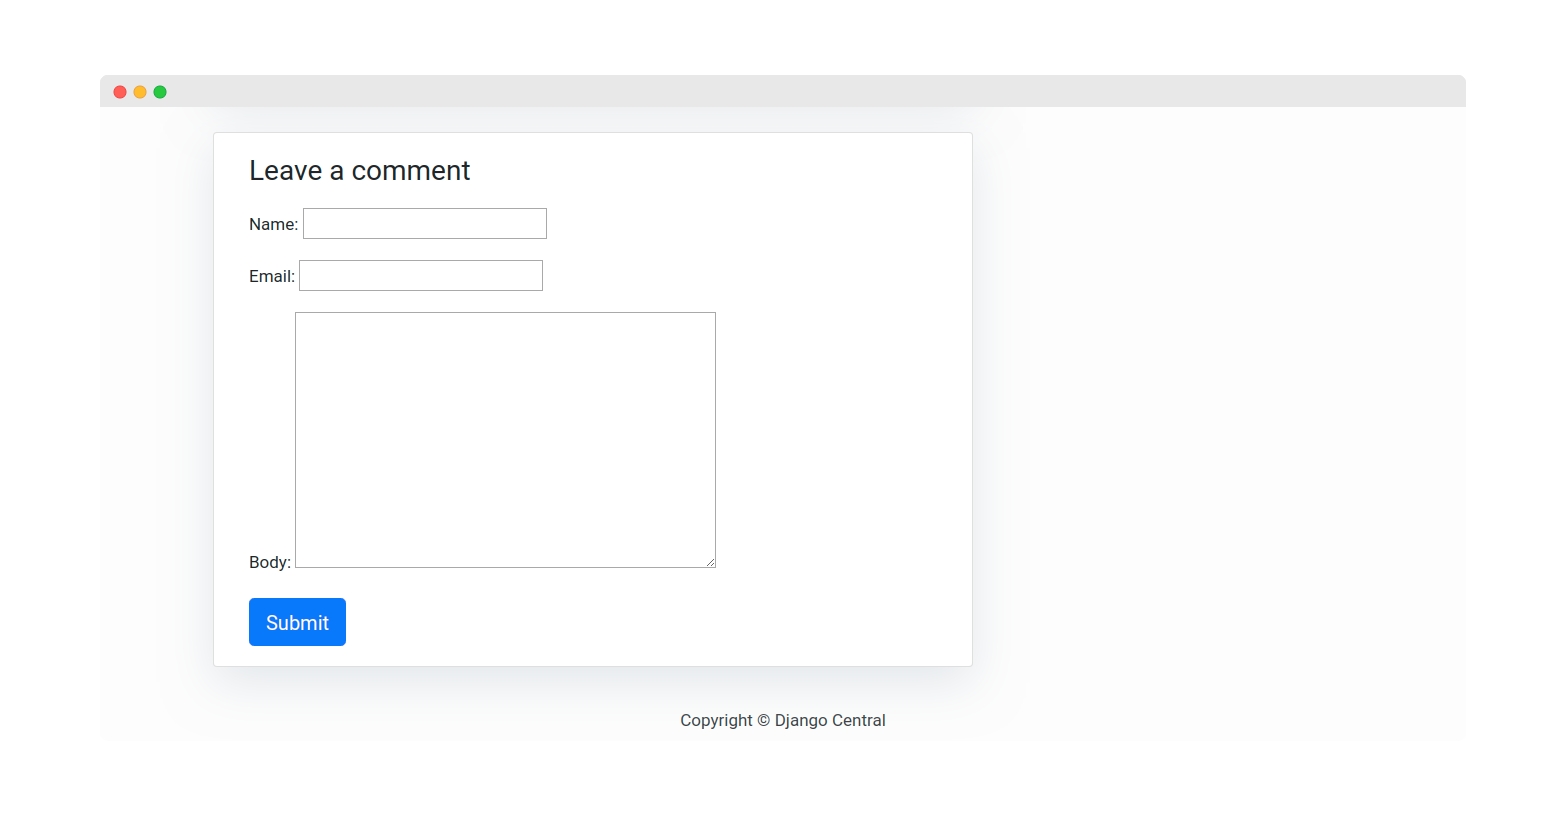
Now create your comment and hit the submit button you should see the message. Now login to the Admin dashboard and approve the comment.
Making Comment Form Crispy
Although our form works as expected, yet we can make the form look better without much changing the template using the Django crispy form library. It's a very popular library for form managing you can check it out here - https://github.com/django-crispy-forms/django-crispy-forms
Install it using
pip install django-crispy-formsAdd it to the installed apps list.
INSTALLED_APPS = [
   ...
 'crispy_forms',]
If you using Bootstrap 4 for styling add this in settings.py file.
CRISPY_TEMPLATE_PACK = 'bootstrap4'Now in your template, you just need to load the crispy tag and use the crispy tag beside the form, as follows.
{% load crispy_forms_tags %}
...
<form method="post" style="margin-top: 1.3em;">
          {{ comment_form | crispy }}
         {% csrf_token %}
         <button type="submit" class="btn btn-primary  btn-lg">Submit</button>
 </form>
Save the files and run the server. 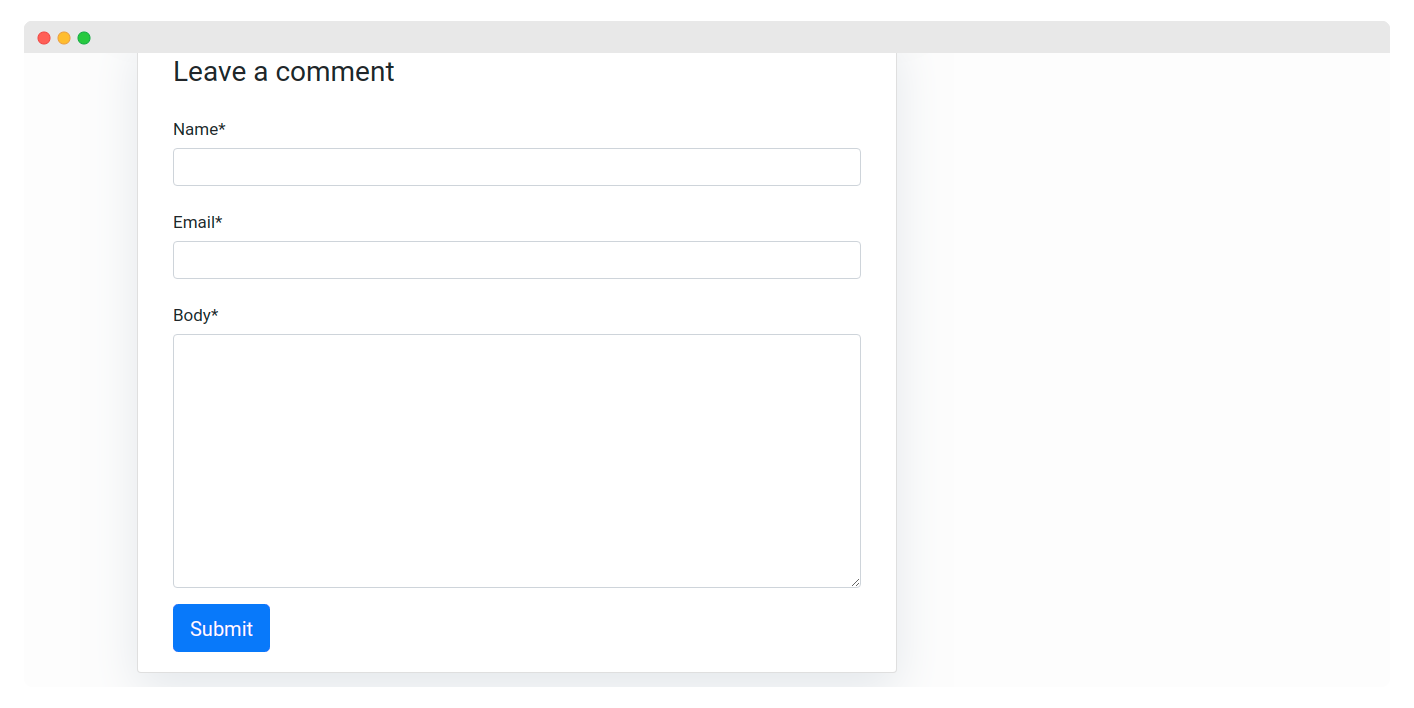
If you are stuck at any step, refer to this GitHub repo